What makes a woodworking project truly stand out?
You see, for most of us, a cutting board is the ultimate beginner project. It’s practical, it’s a great way to learn your power tools, and it’s incredibly forgiving.
But somewhere along the line, beginners are often told to settle for a basic, blocky, heavy-slab look.
I am here to tell you that it doesn’t have to be that way.
You don’t need decades of experience to create something that looks like it belongs in a high-end culinary boutique. By simply combining contrasting woods and adding a few smart, pro-level details, like a sleek chamfered edge or a clean juice groove, you can elevate a standard weekend build into a breathtaking kitchen centerpiece.
It’s still your hands, your time, and your effort. So why not build something you are incredibly proud of?
Today, we are going to walk through exactly how to build a beautiful, modern edge-grain Black Walnut and Hard Maple cutting board.
I will break down the essential tools you need, the techniques to get that flawless finish, and I will even share the exact free dimensional blueprints to guide you through every single step.
Let’s get to work.
The Essential Cutting Board Tool Kit
Before we start making sawdust, let’s talk about the gear.
You don’t need a massive commercial shop to pull this off. But having the right tools makes a world of difference when you are chasing that premium, flawless look.
Here is a quick breakdown of what you will need for this build.
| Tool | Why You Need It |
|---|---|
| Table Saw | The workhorse of this project. You need this for accurately ripping your wooden boards down into the exact widths. |
| Miter Saw | Used for cross-cutting. You will use this to trim your initial strips to length, and later to square up the ends of your final glued-up slab. (Note: A table saw with a crosscut sled works too!) |
| H-Style Pipe Clamps | These provide the heavy-duty force needed for a gap-free glue-up and keep the board stable on your bench. |
| 3/4″ Black Steel Pipes | These are the actual pipes the clamps slide onto. I recommend 24″ lengths for the perfect balance of capacity and storage. |
| Random Orbital Sander | This is the secret to that glass-like, aesthetic finish. A high-quality sander will save you hours of manual labor and give you a perfectly flat surface. |
| Wood Router | The ultimate game-changer. This is necessary for adding the professional ¼” juice groove on top and those sleek, angled chamfer edges on the bottom. |
| 100% Mineral Oil | The hydrating ingredient. You will flood the board with this so it penetrates deep into the wood fibers, preventing the board from drying out or cracking. |
| Beeswax | The protective shield. Buffing this on as your final step creates a water-resistant seal that keeps meat juices out and makes the contrasting wood grain pop. |
If you are just getting started and want to take your woodworking to the next level, I highly recommend investing in a solid Random Orbital Sander and a versatile Wood Router.
Those two tools alone are exactly what takes a project from looking “homemade” to looking professionally crafted.
Once your tools are set up and your workbench is clear, it’s time to talk about the star of the show: the wood.
Choosing Your Wood (The “Aesthetic” Factor)
Wood selection is where the magic happens. It dictates the entire vibe of your project.
For this build, we are pairing Black Walnut with Hard Maple.
Why these two? Because the contrast is absolutely stunning. You get the deep, rich, chocolate tones of the walnut pressed right up against the bright, clean, creamy look of the maple. It is an instant visual upgrade.
But it’s not just about looks. Both of these are hardwoods with a very tight grain structure.
That tight grain is incredibly important for a cutting board.
Quick Pro-Tip: Never use porous woods like Red Oak for food prep surfaces. The open pores will trap moisture, food particles, and bacteria, ruining the board from the inside out.
Now, let’s talk about the orientation of the wood.
If you look closely at our blueprints, you will notice we are building an “Edge-Grain” board, not a “Face-Grain” board.
What does that mean? It means we are taking our strips of wood and turning them on their side before gluing them together.
Face-grain boards (where the wide, flat part of the board faces up) are easier to make, but they show knife marks very quickly.
By turning the wood on its edge, two things happen. First, you get those beautiful, tight, straight lines that give the board its modern aesthetic.
Second, the edge grain is much more resilient. When a knife hits an edge-grain board, the blade slides between the wood fibers rather than severing them. This means fewer scratches, a longer lifespan, and a board that stays looking pristine in your kitchen.
Once your wood is selected, you need to know exactly how to cut it. That brings us to the plans.
Free Dimensional Plans & Cut List
Building an aesthetic cutting board is all about proportions. You want the contrast between the Maple and Walnut to feel intentional and perfectly balanced, not random.
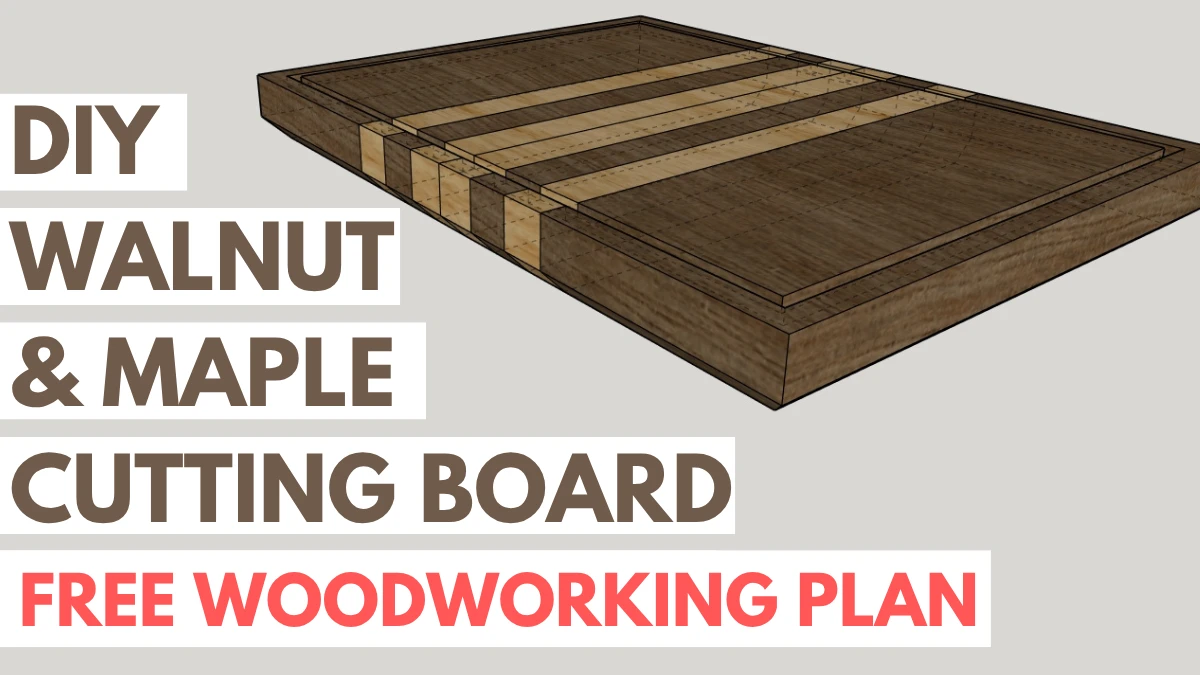
For this build, we are aiming for a substantial, heavy-duty board with final dimensions of 16″ Long x 12″ Wide x 1 ½” Thick.

As you can see, the design relies on a perfectly symmetrical racing-stripe pattern right down the center, flanked by two large Walnut blocks.
To get that perfect 16-inch width without any awkward slivers of wood on the edges, your table saw cuts need to be exact.
I could list out a wall of numbers and math right here, but let’s be honest, trying to keep your phone screen awake to read a blog post while you are standing over a table saw is incredibly frustrating.
Instead, I packaged my SketchUp blueprints into a clean, printable, shop-ready PDF.
It includes:
- The exact strip-by-strip Cut List (so you don’t have to do the math).
- The Exploded View diagram showing exactly how to arrange the pieces.
- The Top and Bottom Blueprint Views with full dimension callouts.
Print it out, take it to your workbench, and get to cutting.
Download the Free Shop-Ready PDF Plans & Cut List Here.
Step-by-Step Build Guide
Let’s get our hands dirty.
Building this cutting board comes down to five straightforward steps. If you have your tools set up, your Walnut and Maple selected, and your PDF plans printed out, you are ready to go.
Take your time, trust the process, and let’s start making some sawdust.
Step 1: Milling and Cutting the Strips
With your PDF Cut List in hand, it is time to head to the table saw.
You are going to rip your Black Walnut and Hard Maple boards into the exact strip widths outlined in the plans.
Remember, we are building an edge-grain board. That means once you cut your strips, you will rotate them 90 degrees so the tight edge grain is facing up.
Step 2: The Stress-Free Glue-Up
Glue-ups can induce panic, but they don’t have to.
Before opening any glue bottles, lay out your Walnut and Maple strips in the exact symmetrical pattern from the blueprint. Do a dry run. Make sure your contrasting racing stripes are right where they belong.
Once you are happy with the layout, rotate every strip 90 degrees so the wide faces are exposed.
Apply a generous, even coat of waterproof, food-safe wood glue. I highly recommend Titebond III. It gives you a slightly longer “open time” to work before it starts setting, and it holds up perfectly to the moisture of a kitchen environment.
Rotate the strips back into place and grab your clamps.
Apply your pipe or bar clamps evenly across the board. Here is the secret to keeping your board flat: alternate your clamps. Place one across the bottom, the next across the top, and so on. This equalizes the pressure and prevents the board from bowing like a banana.
Tighten them just until you see consistent “squeeze-out” (little beads of glue popping up along every single seam).
Wipe off the excess glue with a damp rag, turn off the shop lights, and let it cure completely overnight.
Step 3: Flattening and Sanding
Once your board has cured overnight, pop it out of the clamps and scrape off any dried glue squeeze-out.
Remember how we cut those strips a little long? Now is the time to take your glued-up slab to the table saw. Using a crosscut sled, trim both ends to square them up and bring your board down to its final, perfect 12-inch length.
Next, grab your random orbital sander. Start with a rough 80-grit sandpaper to flatten out the surface and make all the seams perfectly flush. Take your time here. Once the board is flat, work your way up through the grits, 120, then 150, and finally 220-grit.
Step 4: Routing the Details (Juice Groove & Chamfer)
This is where your project goes from just a nice block of wood to a boutique kitchen piece. You are adding the aesthetic details that separate amateur builds from professional craftsmanship.
First, flip the board upside down. Using a 45-degree chamfer bit in your wood router, cut a deep angle along all four bottom edges.
This doesn’t just give the board a modern, floating appearance on the counter, it creates a natural, built-in handle so you can easily pick up this heavy 1 ½-inch thick slab.
Next, flip the board over to the top face. Using a ¼-inch round-nose bit, carefully route a perimeter juice groove.
Go slow and let the tool do the work. A clean, straight juice groove is incredibly practical for carving meats and is the ultimate mark of a pro build.
Step 5: The Oil Finish (The Best Part)
You have done the hard work. Now you get the reward.
Wipe away all the remaining sawdust and flood the board with a heavy coat of food-safe mineral oil.
There is absolutely nothing quite like this step. Watching those dull, sanded boards instantly come to life is the best feeling in woodworking.
The Hard Maple will turn a warm, rich cream, and the Black Walnut will explode into deep, dark chocolates.
Let the board drink in the oil for a few hours. Wipe off the excess, and then buff on a final coat of beeswax for added moisture protection.
Frequently Asked Questions
Before we wrap up, I want to address a few common hurdles.
When you are just starting out with woodworking, especially with projects meant for food prep in the kitchen, it is completely normal to have some questions about materials and finishes.
Here are a few things I get asked all the time.
What is the best wood for a cutting board?
The best woods for cutting boards are tight-grained hardwoods like Hard Maple, Black Walnut, and Cherry. These woods are dense enough to resist deep knife scratches but not so hard that they dull your kitchen knives. Always avoid porous woods like Red Oak or softwoods like Pine, as they can trap moisture and bacteria.
What is the difference between face-grain and edge-grain cutting boards?
A face-grain board is made by gluing the wide, flat sides of the wood together, showing off the arching grain patterns. An edge-grain board is made by turning the strips on their side, exposing the tighter, straighter grain. Edge-grain boards are much more durable, hide knife marks better, and offer a more modern, aesthetic look.
What should I use to seal my wooden cutting board?
You should only use food-safe finishes that will not go rancid. 100% food-grade mineral oil is the industry standard. For the best protection, flood the board with mineral oil, let it soak in, and then buff on a top coat of beeswax to seal out moisture. Never use olive oil or vegetable oil, as they will spoil over time.
How thick should a good wooden cutting board be?
A high-quality, aesthetic cutting board should generally be between 1 ¼ inches and 2 inches thick. This thickness provides the substantial, heavy-duty feel of a premium kitchen centerpiece and prevents the board from warping or bowing when washed.
Conclusion
There is a very unique kind of pride that comes from slicing vegetables or serving food on a cutting board you built with your own bare hands.
Whether it is taking pride of place on your own kitchen counter or you are giving it away as an incredibly thoughtful, personalized gift, this edge-grain board is built to last a lifetime.
If you are feeling inspired to tackle this build but realize your shop is missing a few pieces of gear to pull it off, here is the Essential Tool Kit table again.
| Tool | Why You Need It |
|---|---|
| Table Saw | The workhorse of this project. You need this for accurately ripping your wooden boards down into the exact widths. |
| Miter Saw | Used for cross-cutting. You will use this to trim your initial strips to length, and later to square up the ends of your final glued-up slab. (Note: A table saw with a crosscut sled works too!) |
| H-Style Pipe Clamps | These provide the heavy-duty force needed for a gap-free glue-up and keep the board stable on your bench. |
| 3/4″ Black Steel Pipes | These are the actual pipes the clamps slide onto. I recommend 24″ lengths for the perfect balance of capacity and storage. |
| Random Orbital Sander | This is the secret to that glass-like, aesthetic finish. A high-quality sander will save you hours of manual labor and give you a perfectly flat surface. |
| Wood Router | The ultimate game-changer. This is necessary for adding the professional ¼” juice groove on top and those sleek, angled chamfer edges on the bottom. |
| 100% Mineral Oil | The hydrating ingredient. You will flood the board with this so it penetrates deep into the wood fibers, preventing the board from drying out or cracking. |
| Beeswax | The protective shield. Buffing this on as your final step creates a water-resistant seal that keeps meat juices out and makes the contrasting wood grain pop. |
Upgrading your sander or getting your hands on a wood router is the quickest way to take your projects to the next level.
Take your time, trust the process, and don’t forget to grab the free PDF plans before you head to the shop.
If you found this build guide helpful, be sure to pin this article for later so you can easily find it when you are ready to make some sawdust.
Take care of yourselves and I will see you around.